


Geek Barn
Raspberry Pi 4 Camera Night Vision Focal Adjustable 5 MP OV5647 Automatically Switch Day Night Mode for RPI 3B+ 3B Zero
Raspberry Pi 4 Camera Night Vision Focal Adjustable 5 MP OV5647 Automatically Switch Day Night Mode for RPI 3B+ 3B Zero
Couldn't load pickup availability
SPECIFICATIONS
Brand Name: SHCHV
Accessory Type: Camera Module
Origin: Mainland China
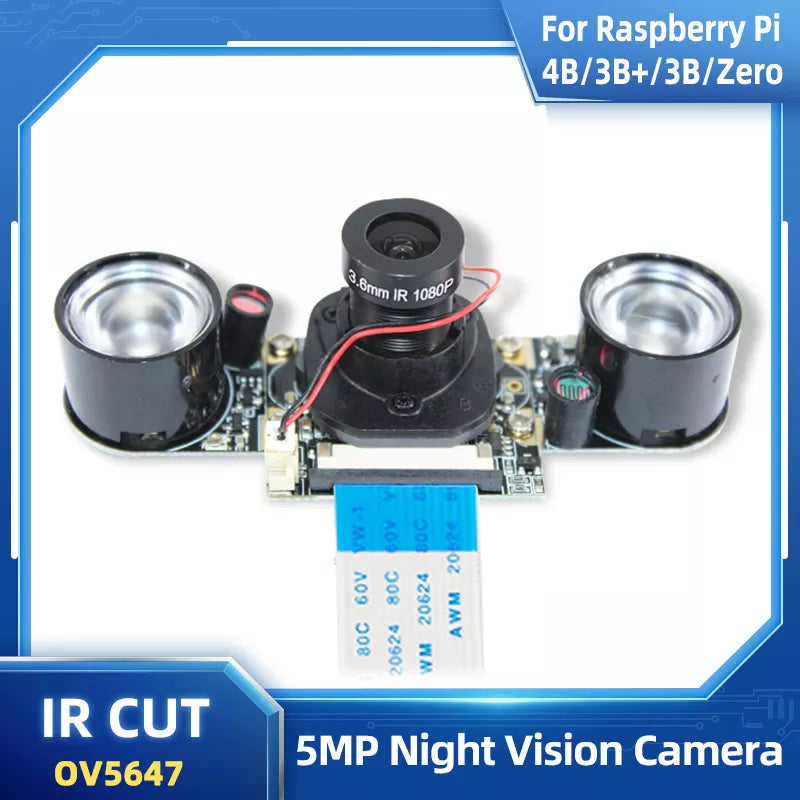
Compatible With: Raspberry Pi 4B/3B+/3B/Zero
Sensor: OV5647
Focal: Adjustable
Night Vision: Yes
Pixel: 5 MP
FOV: 75 degree (diagonal)
IR CUT: Yes
Raspberry Pi IRCUT Camera Night Vision Focal Adjustable 5MP OV5647 Sensor Camera
Introduction :
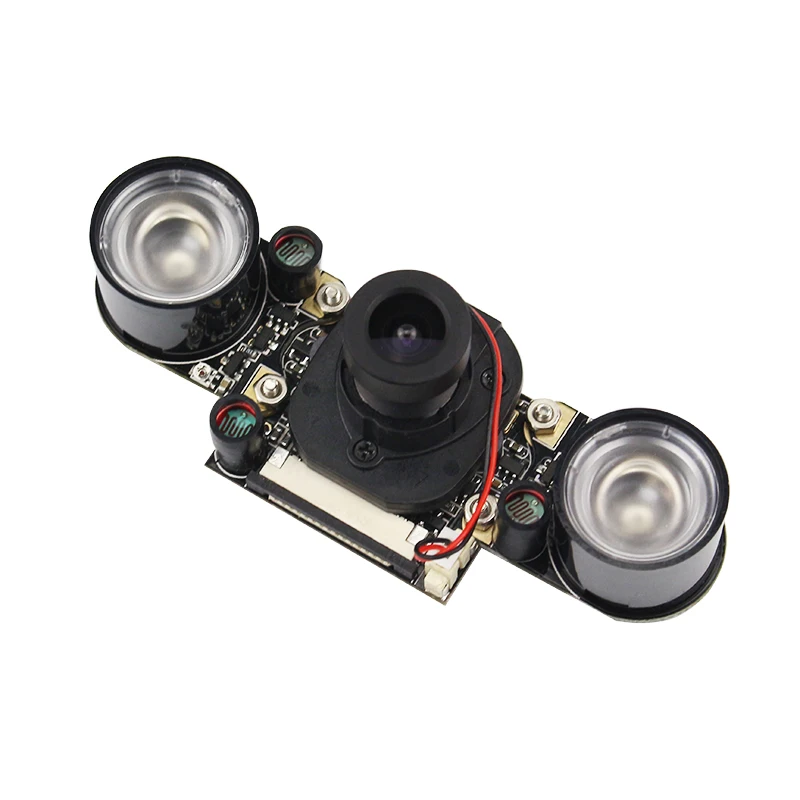
The Raspberry Pi IR-CUT Camera is the day and night camera.
You can get the best imaging whatever it is in the daytime or at night.
It's a built-in IR-CUT camera, can be used during the day and night.
Automatically switch to night or night model :
When the camera at daytime will switch to day mode , the camera image is a normal color image, when the camera at night will switch to night mode , the camera can normally identify the infrared fill light of the light, which can be set through the software switch, to solve the other night vision camera during the day to take pictures of the image color is not normal.
Feature:
1. Raspberry Pi Camera, supports all revisions of the Raspberry Pi.
2. Embedded removable IR-CUT filter, eliminating color distortion in the daylight
3. Comes with infrared LED, supports night vision
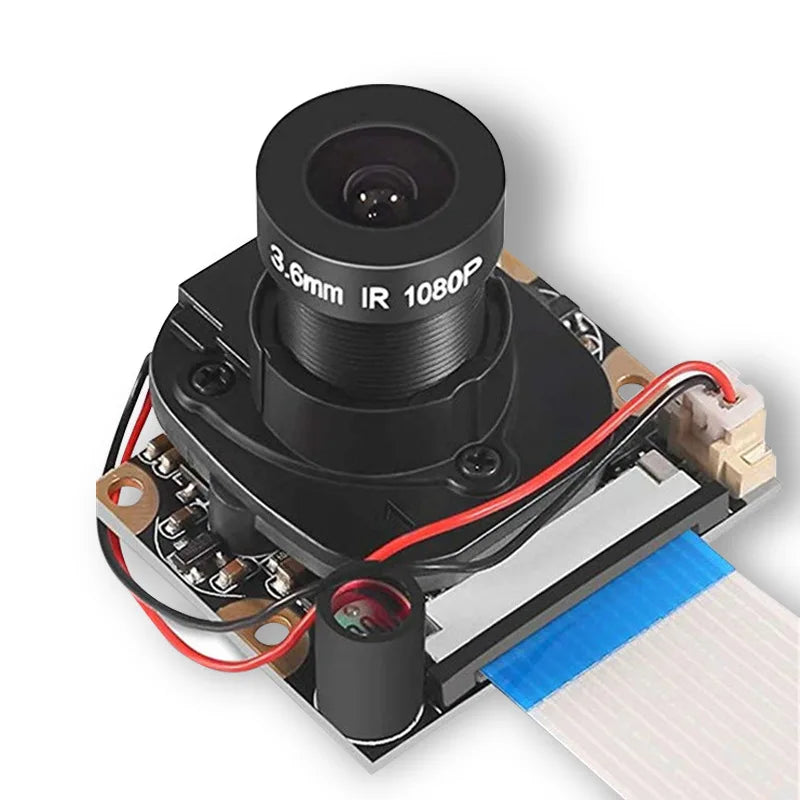
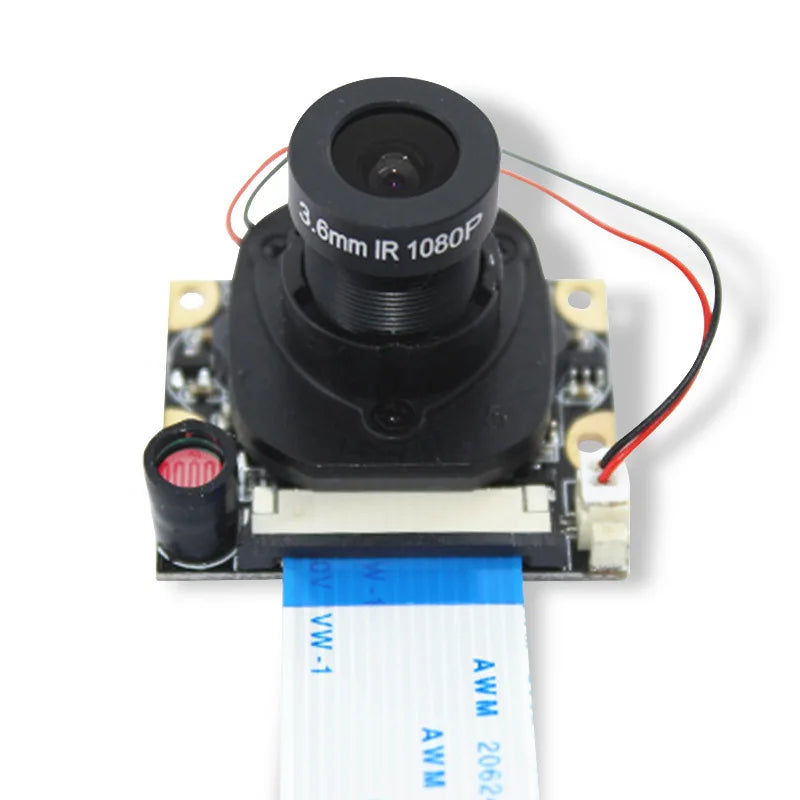
4. 5 megapixel OV5647 sensor
5. Camera specifications
6. CCD size: 1 / 4inch
7. Aperture (F): 1.8
8. Focal Length: 3.6mm adjustable
9. Field of View: 75.7 degree ( diagonal )
10. Sensor best resolution: 1080p
11. 4 screw holes to fix the IR lights or holder.
12. Used for attachment
13. Provides 3.3V power output
14. Supports connecting infraredLED and / or fill flash LED
15. Dimension: 31 mm × 32 mm
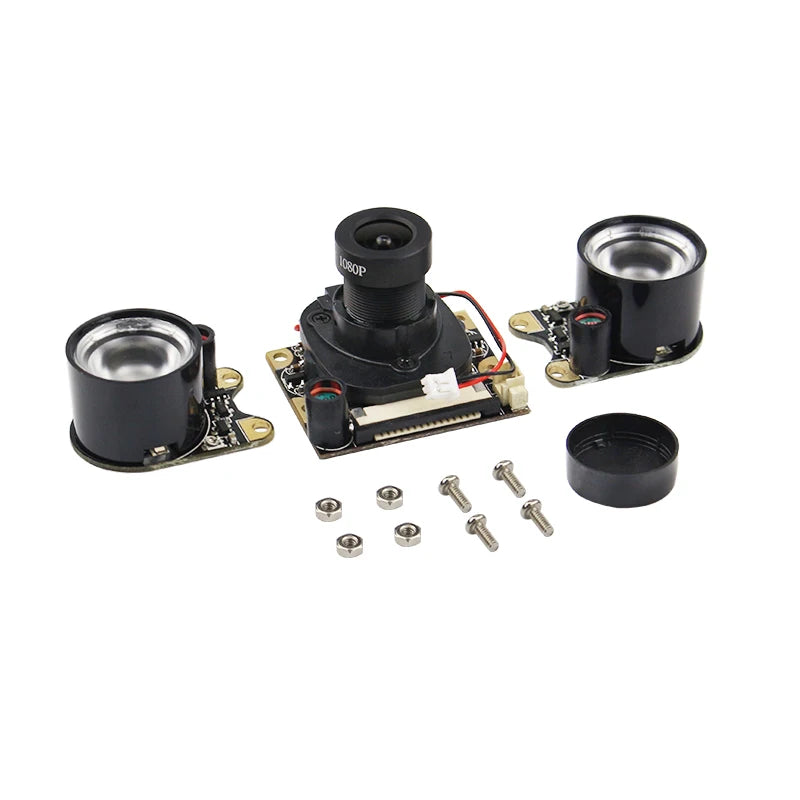
Packing List :
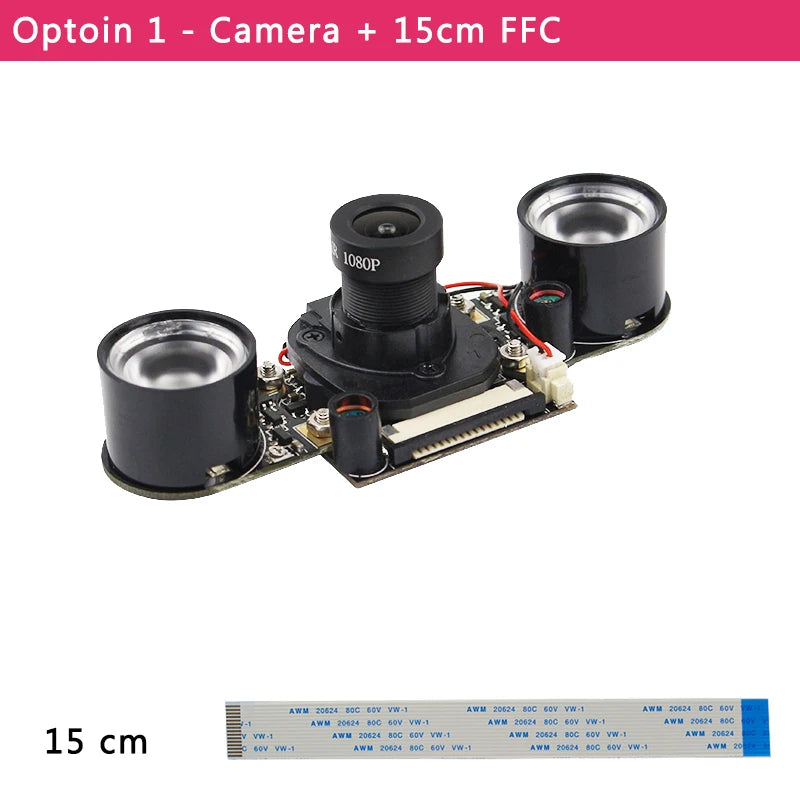
Option 1:
1 x IR-Cut Camera
2 x IR Lights
1 x 15 cm FFC
1 set x Screws and Nuts
( not include Raspberry Pi )
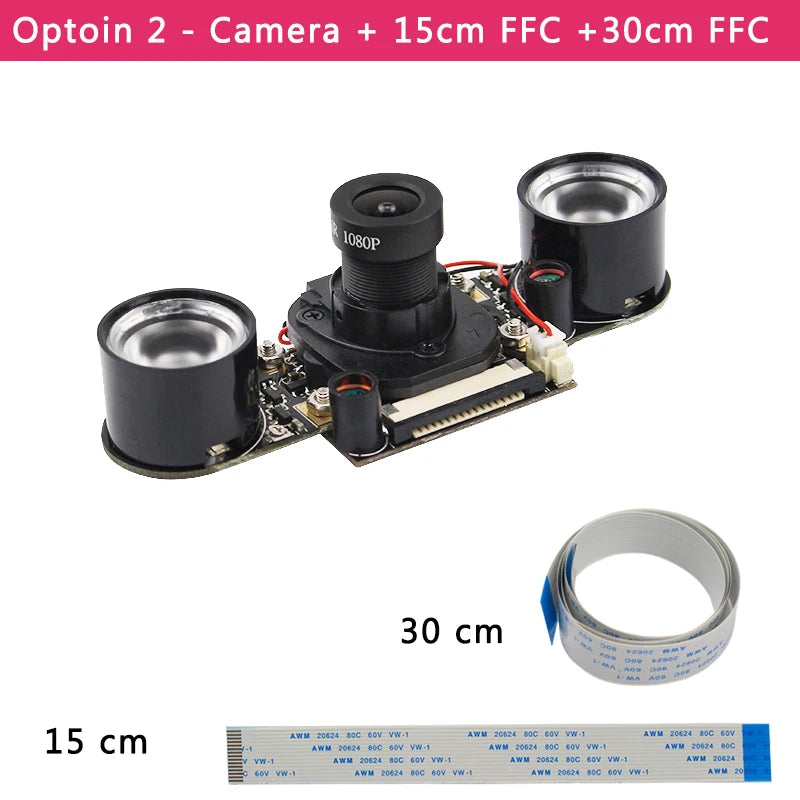
Option 2:
1 x IR-Cut Camera
2 x IR Lights
1 x 15 cm FFC
1 x 30 cm FFC
1 set x Screws and Nuts
( not include Raspberry Pi )
Option 3:
1 x IR-Cut Camera
2 x IR Lights
1 x 15 cm FFC
1 x 50 cm FFC
1 set x Screws and Nuts
( not include Raspberry Pi )
Option 4:
1 x IR-Cut Camera
2 x IR Lights
1 x 15 cm FFC
1 x 1m FFC
1 set x Screws and Nuts
( not include Raspberry Pi )
Option 5:
1 x IR-Cut Camera
2 x IR Lights
1 x 15 cm FFC
1 x 2m FFC
1 set x Screws and Nuts
( not include Raspberry Pi )
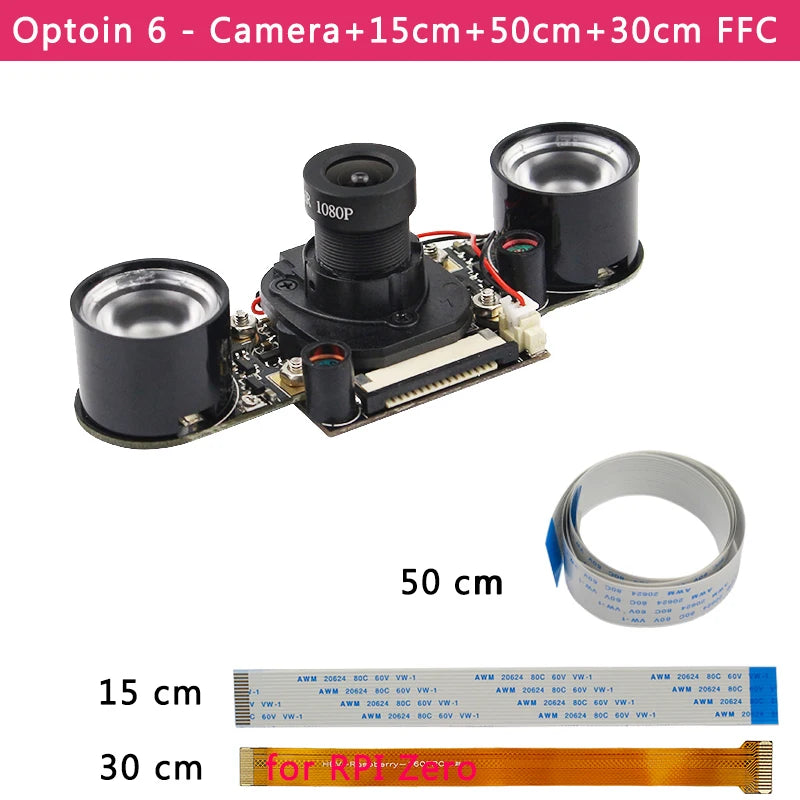
Option 6:
1 x IR-Cut Camera1 x IR-Cut Camera
2 x IR Lights
1 x 15 cm FFC
1 x 50 cm FFC1 x 50 cm FFC
1 x 30 cm FFC (for RPI Zero)
1 set x Screws and Nuts
( not include Raspberry Pi )
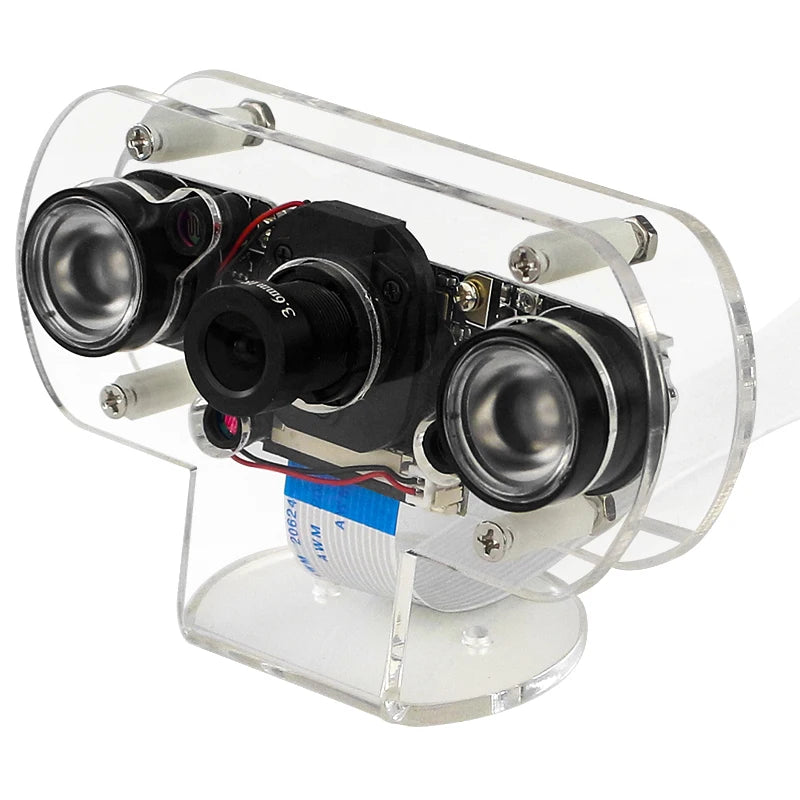
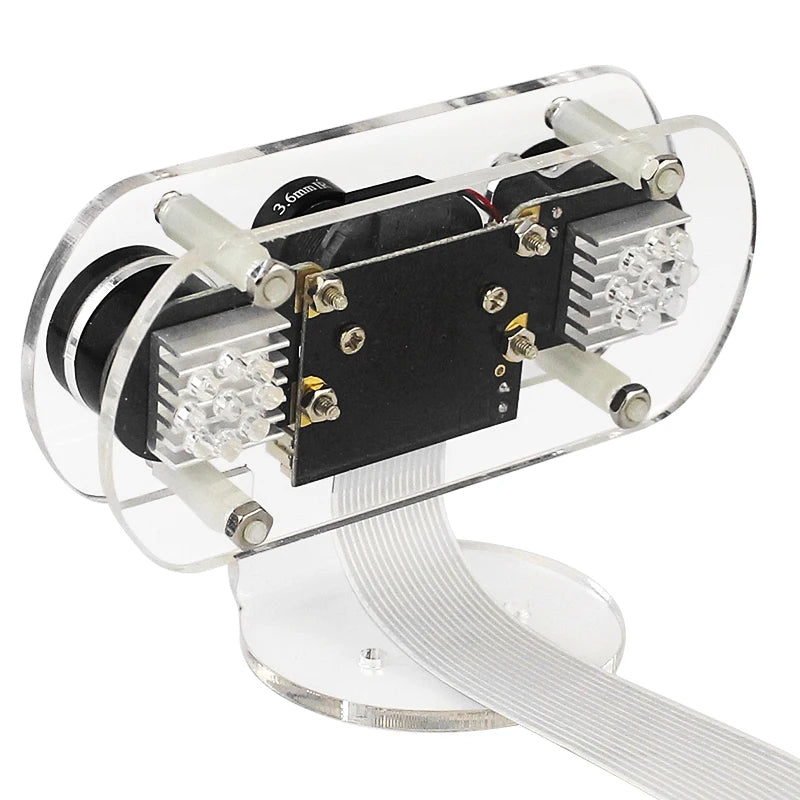
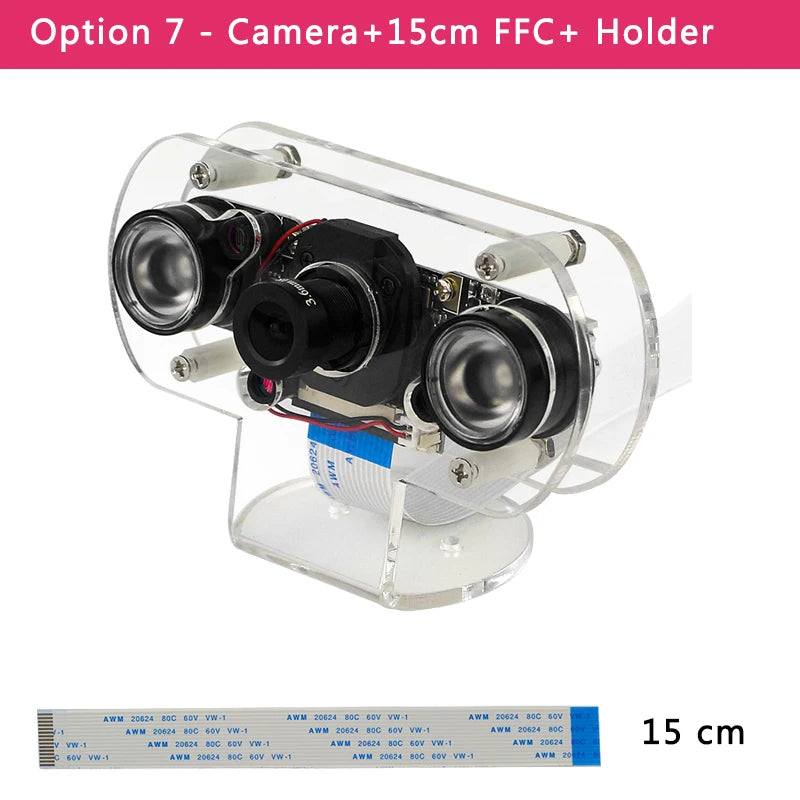
Option 7:
1 x IR-Cut Camera
2 x IR Lights
1 x 15 cm FFC
1 set x Screws and Nuts
1 x Acrylic Holder
2 x Heatsinks
( not include Raspberry Pi )


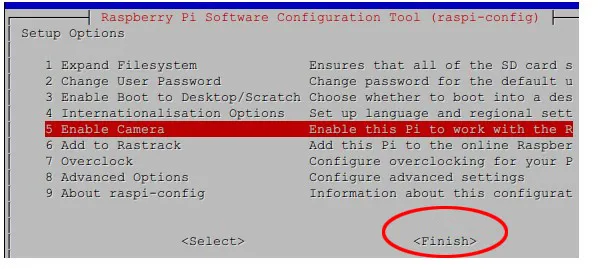
2. Then select: Enable

3. Then the system return to the interface itself. Choose the “Finish “ , it will restart:
4. After the raspberry pi system restart , you can use raspberry pi camera now.
If you want to take photo, you can run the command :raspistill
For example,input: raspistill –t 2000 -o 1.jpg
-t: ( the time of waiting to take the photo ,5000 is five seconds). – o 1.jpg (1.jpg is command of file)
Tip:
4. The captured video clip needs to play with mplayer